
How to Create a Dynamic Contact Form using Magento Custom Contact Forms
In the past few months we have received several inquiries from customers asking how to create dynamic contact forms for Magento, meaning forms with dependent fields that only appear on the front-end under certain conditions. The condition on which a dependent form field should be shown could be a certain value in form field X or a selected option in form field Y.
At Plugin Company we immediately agreed that a dynamic contact form functionality would be a great addition to our Custom Contact Forms extension for Magento, which enables users to create advanced contact forms with its simple drag & drop form builder. That's why we recently added the conditional form fields feature to our extension, which lets you make any of the custom contact form fields dependent, without any coding skills required!
This article will explain how to easily create a dynamic contact form with conditional form fields using our Magento extension. It uses the conditional contact form example from our Custom Contact Forms live demo, which you should definitely check out if you'd like to personally experience our extension's ease of use!
Creating a Custom Contact Form for Magento
In our first contact form tutorial we have already explained in detail how to create a custom contact form using our Magento extension, so in this article we'll suffice with summarizing the steps below.
To create a new contact form, navigate to CMS > Contact Forms > Manage Contact Forms in the top Admin Panel Menu and click the 'Add Form' button. This will open the Form Settings tab, where you can configure the general settings of the form, including the form name and front-end URL settings. Besides that you can choose to save the form submissions in the back-end, allowing you to export submitted form data to CSV or Excel.
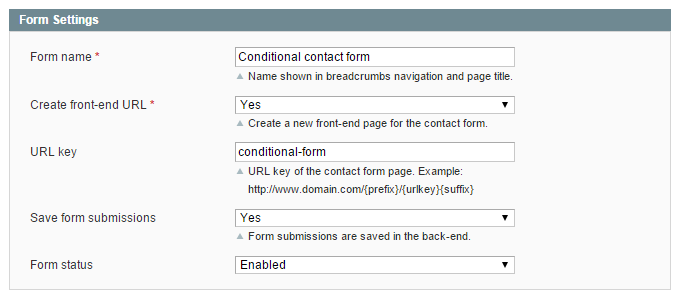
If you choose to automatically create a front-end page for the contact form, you can find the form URL(s) in the bottom section of the Form Settings tab after saving the contact form. These can be used as quick-view links to check the changes made to your contact form on the front-end.

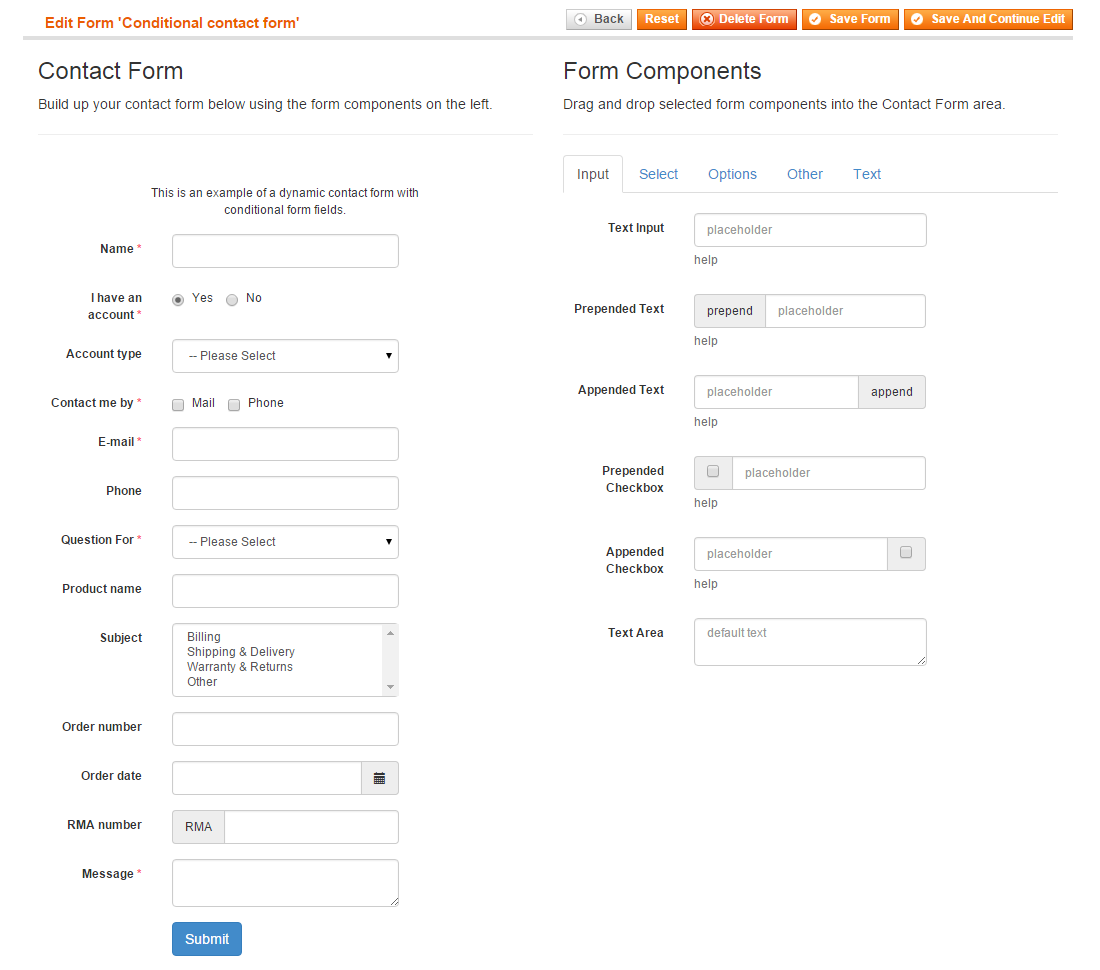
Now open the Form Builder tab to build up your form by simply dragging and dropping the desired form components into the Contact Form area. For our dynamic contact form example we have created a form that includes various input and selection fields enabling customers to select their account type, preferred contact method and enter additional question details:
This is what the custom contact form example above would look like on the front-end, using the Cerulean theme in combination with the Well wrapper (you can find more information about configuring the contact form front-end style here):
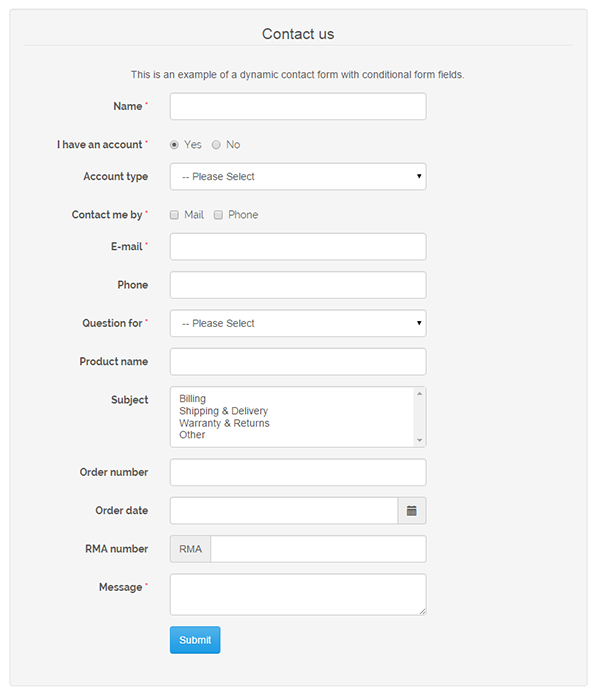
Because some form fields are only relevant under certain conditions, we will make them appear dynamically on the front-end by configuring conditional form fields in the next step.
Before saving the contact form, make sure that each form field has a unique ID, which can be entered when customizing the form components. This is not only important for setting up conditional form fields, but also to correctly display contact form submissions in the back-end and in the customer/admin e-mail notifications.
Creating Conditional Form Fields
After saving your custom contact form, open the Conditional Form Fields tab to make any of the added form fields dependent. Select the field you would like to display dynamically from the drop-down menu, which shows all fields included in the contact form sorted by their ID, then click 'Add Field'.
* The values wrapped in brackets below are the form field IDs used in our example form. The descriptions in bold are the label texts of the form fields.

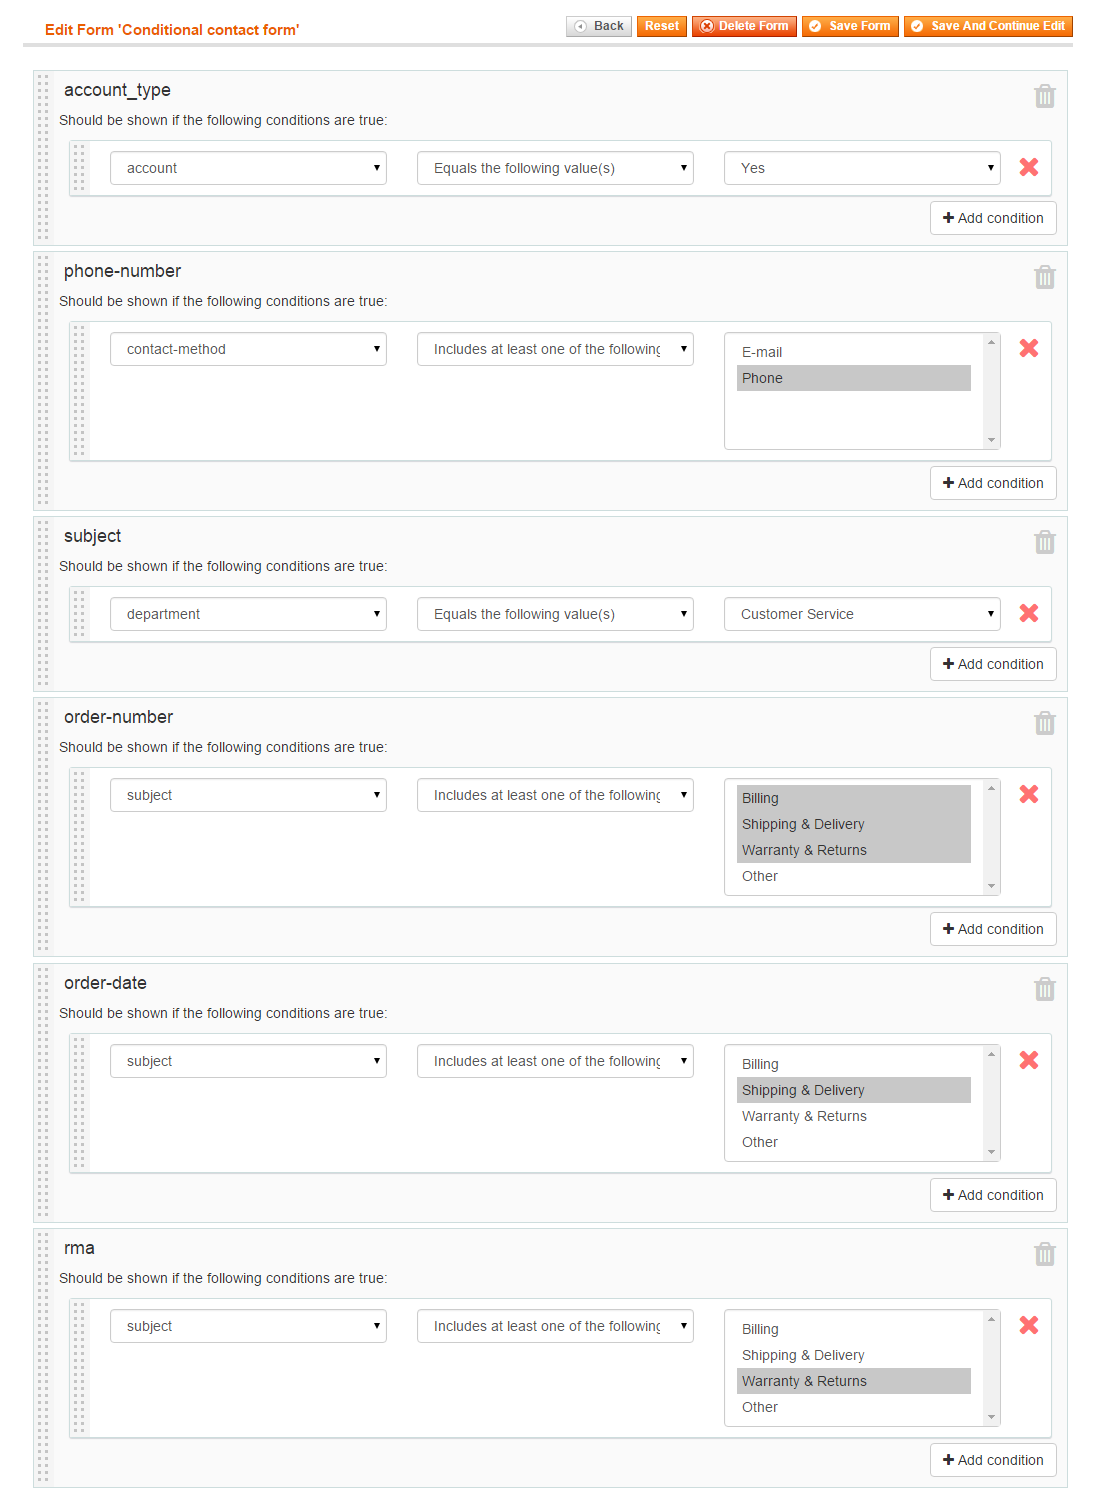
In this case we will make the Account type [account-type] drop-down menu conditional, which includes the options 'Private Sales Member', 'Retailer' and 'Wholesale'. We only want to show this field under the condition that 'Yes' is selected from the I have an account [account] radio buttons.

Click the 'Add condition' button to add a new form field condition. Now you can select the form field and its values that are required to display the conditional form field, in this example the form field with ID 'account' that equals the value 'Yes'.

You can add as many conditions per form field as you want by clicking 'Add conditions' and create more conditional form fields with the 'Add Field' button. Following the same method as described above, we will make the following form fields conditional as well:
The Phone number [phone-number] input field should be shown on condition that at least the option 'Phone' is selected from the Contact me by [contact-method] check-boxes. Because check-boxes allow multiple selections, the Phone number input field will also appear if both 'Phone' AND 'E-mail' are selected on the front-end.
The Subject [subject] drop-down menu should be shown on condition that 'Customer Service' is selected from the Question for [department] drop-down. This means that if 'Sales' is selected instead of 'Customer Service', the Subject drop-down won't be displayed on the front-end.
The Order number [order-number] input field should be shown on condition that at least one of the following values are selected from the Subject [subject] drop-down: 'Billing', 'Shipping & Delivery' or 'Warranty & Returns'. Because the Subject field is a list box, multiple selection are possible and any combination of the fore-mentioned options will trigger the Order number field.
The Order date [order-date] picker should be shown on condition that at least 'Shipping & Delivery' is selected from the Subject [subject] drop-down.
The RMA number [rma] input field should be shown on condition that at least 'Warranty & Returns' is selected from the Subject [subject] drop-down.
The full set of conditional form fields listed above would look like this when configured in the Magento Admin Panel:
Besides the conditions exemplified above that are configured to equal a specific value or include at least one of the listed values, it's also possible to create conditions that DON'T equal a specific value, include ALL of the listed values or that match a specific regular expression.

When the dependent form field is a selection field, such as radio buttons, check-boxes, a drop-down menu or a list box, the conditional values can be selected from the drop-down menu on the right. With regular input fields you can manually enter conditional value(s) as a text.
Using Dynamic Contact Forms in Magento
After adding the conditional fields to our example contact form above, it will look like this on the front-end when opening the contact form page:
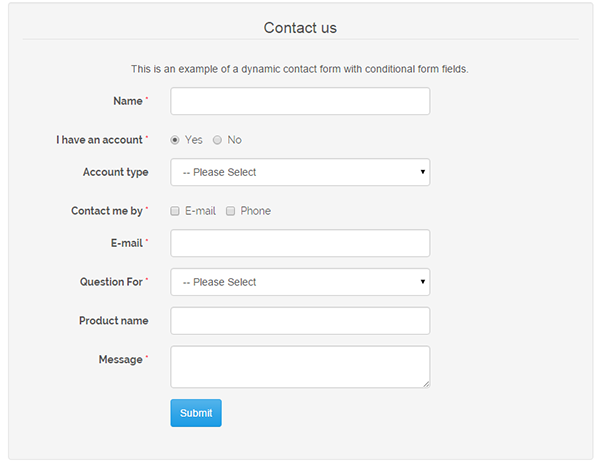
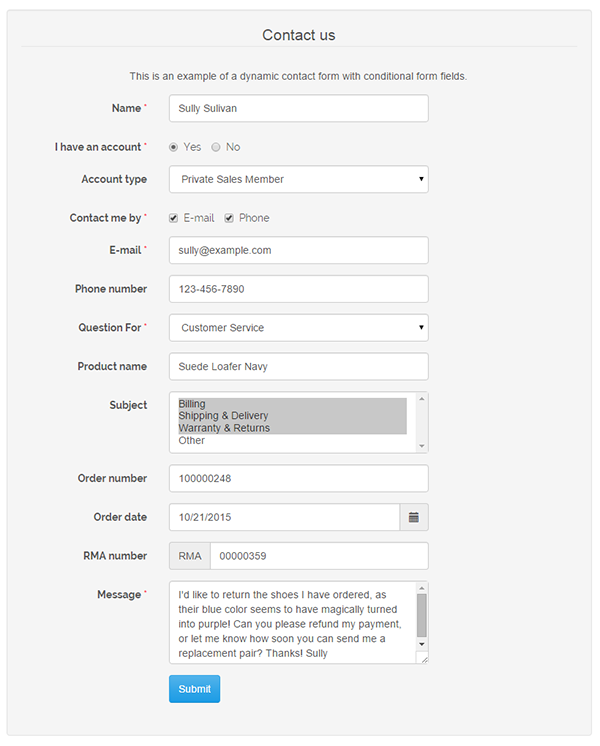
The contact form will dynamically show the conditional form fields depending on the customer's input. The example submission below is completed in a way to show all conditional fields, which are Account Type, Phone Number, Subject, Order Number and RMA Number:
Summary
This article has shown how easy it is to create conditional forms for Magento using our Custom Contact Forms extension, which shows dependent form fields dynamically based on the customer's input.
The conditional form used in this tutorial is just a simple example showcasing some of the possibilities for creating your own dynamic contact form for Magento. Don't forget to check out our Magento Custom Contact Forms live demo if you'd like to build your own conditional form or view the example form in our demo store!
You can also find our extension on Magento Connect and read more about its functionalities in our Custom Contact Forms blog posts below.
[…] fields dependent, meaning they only appear on the front-end under specified conditions. Check out this blog post to learn more about our extension's conditional form fields […]
[…] Creating a Dynamic Contact Form for Magento […]
[…] Creating a Dynamic Contact Form for Magento […]